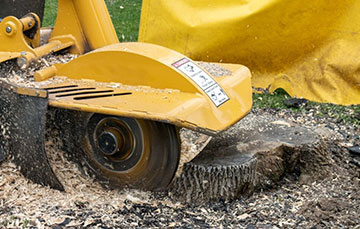
Dealing with the remnants of tree removal can be a hassle, but it doesn’t have to be. If professional services are out of reach, don’t worry. With the right approach, you can grind stumps in your yard by yourself. Here’s an extended guide to DIY stump grinding.
Step 1: Prioritize Safety
Before embarking on this DIY task, it’s crucial to prioritize safety. Equip yourself with essential safety gear, including protective goggles to shield your eyes from flying debris, durable gloves to protect your hands, ear protection to guard against the loud noise of the grinder, and steel-toe boots for foot safety. Additionally, wear long pants and a long-sleeved shirt to protect your skin. Remember, handling heavy machinery requires strict adherence to safety measures to prevent accidents.
Step 2: Renting the Right Stump Grinder
The key tool for stump grinding is the stump grinder itself. You can rent one from hardware stores or local equipment rental services. When choosing a grinder, consider the size of the stump, the grinder’s ease of use, and your own comfort and experience with such machinery. Grinders come in various sizes; for smaller stumps, a handheld grinder might suffice, but for larger stumps, a more robust, wheeled model may be necessary. Ask for a demonstration or tips on using the machine safely and effectively when you rent it.
Step 3: Preparing the Stump and Surrounding Area
Preparation is vital. Start by removing any rocks, sticks, or debris around the stump to prevent them from becoming projectiles once grinding begins. It’s also essential to locate and mark any underground utilities like gas, water, or electrical lines to avoid damage. Trim the stump as close to the ground as possible using a chainsaw, which reduces the amount of grinding needed and makes the process more manageable.
Step 4: Mastering the Grinder
Operating the stump grinder is a careful process. Position it over the stump and turn it on, following the manufacturer’s instructions closely. Use the grinder’s controls to slowly lower the cutting wheel onto the stump. Move it side to side in a sweeping motion to grind the stump incrementally. Be patient and allow the grinder to work at its own pace; applying too much pressure can damage the grinder or cause it to operate inefficiently. Watch this tutorial on how to operate a stump grinder.
Step 5: Going Beyond the Surface
Don’t limit your grinding to just the visible part of the stump. To prevent regrowth and future issues, it’s crucial to grind at least 4-6 inches below the ground level. This depth ensures that the root system is sufficiently disrupted to prevent the stump from sprouting anew. It also creates a level area for filling and landscaping.
Step 6: Managing the Aftermath
Post-grinding, you’ll have a significant amount of wood chips and soil mixture. This can be repurposed as mulch for your garden or disposed of in accordance with local waste management guidelines. If using as mulch, spread it evenly around plants or trees to enrich the soil and retain moisture.
Step 7: Restoring the Area
After removing the stump, fill the resulting hole with topsoil to promote grass growth or prepare it for planting. If you’re reseeding with grass, spread grass seed evenly, cover it lightly with soil, and ensure regular watering to establish new growth. This step is crucial for restoring the aesthetic appeal of your yard and preventing sinkholes or uneven ground.
Step 8: Equipment Care and Return
After you’re done, clean the stump grinder to remove any wood residue or dirt. Inspect it for any damage and report this to the rental company upon return. Proper maintenance and cleaning help keep the equipment in good condition for future users.
Extra Tips for a Smooth Process
- Always operate the stump grinder in daylight or well-lit conditions.
- Take regular breaks to avoid fatigue, which can lead to accidents.
- Ask a friend or family member to be around for assistance or in case of emergencies.
Conclusion Grinding a stump by yourself can be a satisfying and cost-effective way to manage your yard’s appearance and safety. While it requires effort, patience, and adherence to safety protocols, the result is a clear, usable outdoor space. With the right tools and approach, any homeowner can tackle this task successfully. If tackling this challenge is overwhelming and you decide to hire a company, read this blog on how to find the right company to use.

SEO services and digital marketing provided by Powerful Media Solutions